

Avoid A Mess: Empty Your Waste Tanks Cleanly & Easily
- viarv service
.jpg/v1/fill/w_320,h_320/file.jpg)
- May 23, 2019
- 4 min read
oo many good things in RVing are becoming less and less available. Of late, that seems to include free RV waste dumping stations. In recent years, you could dump your tanks at many highway rest stops, facilities behind gas stations, and of course (and most commonly), at many RV parks.
Today, it’s a different story. You have to open your wallet now to dump your waste at those rare spots. What has happened is a combination of restricted government funding, and in too many cases, a few either uncaring or uneducated individuals leaving behind a mess giving the rest of us a bad reputation.

A surprising number of RVers are getting into the lifestyle and upon purchase of their unit, they are given full instructions by dealers on how to run their RV refrigerator, air conditioner, TV, and microwave, etc. but are never clearly taught how to dump waste. Whether you’re a newbie (or a seasoned veteran who needs a refresher every now and then), here is our version of Tank Dumping 101—plus a few extra tips you may not know.
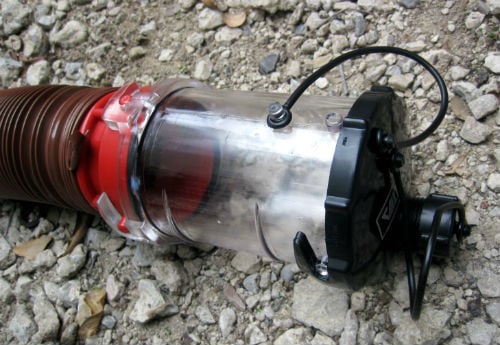
Pull your rig up to the dump station, carefully getting your black water (toilet) connection as close to it as possible. Being close means if there’s a spill, it’s much more contained. Always dump your black water first as gray water will rinse the black water evils out of your hose.Pull on a pair of rubber gloves. Many use throwaway gloves while others find reusable, industrial gloves work better.Place the discharge end of your sewer hose into the dump station receptacle. You’ll often find a brass step on-style lid covering the receiving port, and often a big rock handy to hold the lid open while you slide in the hose. With the hose inside the receiving port several inches, put that big rock on the hose to keep it from jumping free (and spreading its contents around where you don’t want it).Before you remove your rig’s waste valve termination cap, ensure that all slide valves are firmly closed (this will prevent you from taking a large, unnecessary bath). If a valve is open, close it, then, by simply holding the open end of your sewer hose under the valve to catch a spill, gently and carefully “crack open” the termination cap and try and get the contents into the hose.Attach your sewer hose to the sewer valve adapter. Push it straight on and firmly turn it clockwise. Push and pull on the hose fitting to ensure a tight connection.Verify your connection by barely cracking open the black water valve. If you get a leak, close the valve quickly and verify your hose-to-valve adapter connection. When you’re sure of a tight connection, proceed to the next step.Pull the black water lever wide open. Allow the tank’s contents to completely empty. Here is where having a clear plastic fitting on the valve adapter end of the sewer hose really helps (among other products available) – you can watch to make sure the flow stops.Close the black water valve.Open the gray water valve. Allow the flow to completely stop before closing the gray water valve.Disconnect the sewer hose and hold it up carefully to prevent any liquid remaining in the hose from gushing back out. Lift it up from the RV end, running any remaining liquids down into the dump station receptacle.Use the dump station rinse hose to flush out your sewer hose – while still connected to the dump station receptacle. Never use your fresh water hose.Remove the sewer hose from the receptacle and store it away.With the ubiquitous rock holding the dump station receptacle cover open, use the rinse hose to clean up any spills. Close the cover and replace the rinse hose.Replace your waste valve termination cap.
Some extra waste dumping tips
A couple of situations may make your dump station task a bit more daunting. You may encounter a dump station where the pavement is graded away from the receptacle, leaving your RV leaning away from the dump station.
Since water doesn’t flow uphill too well, you may have to milk your sewer hose. Follow the instructions listed above, but when you get to step 10, don’t disconnect the hose yet. Close the valve, leave the hose connected then, starting at the RV end of the hose, pick up the hose and force the liquid “uphill” to the dump station.
It’s an awkward arrangement, but basically, you’ll lift the hose as high as you can, forcing the liquid toward the dump station, raising the “outflow” end of the hose, and dropping the RV-end of the hose as you go. You may need to repeat the step several times to empty it out but it works.
If your RV has more than a single gray water system, you’ll want to dump your black water tank first, then the companion gray water system, then reposition the RV to line up the dump valve for the other gray water system.
By following these few steps can spare you a lot of mess. It will also keep dump station owners happy and keep their stations open and accessible for all of us.
This information is for educational purposes. VIARV shall not be responsible nor retain liability for RVer’s use of the provided information. Prior to making any RV service decision, you are advised to consult with an RV professional.


Comments